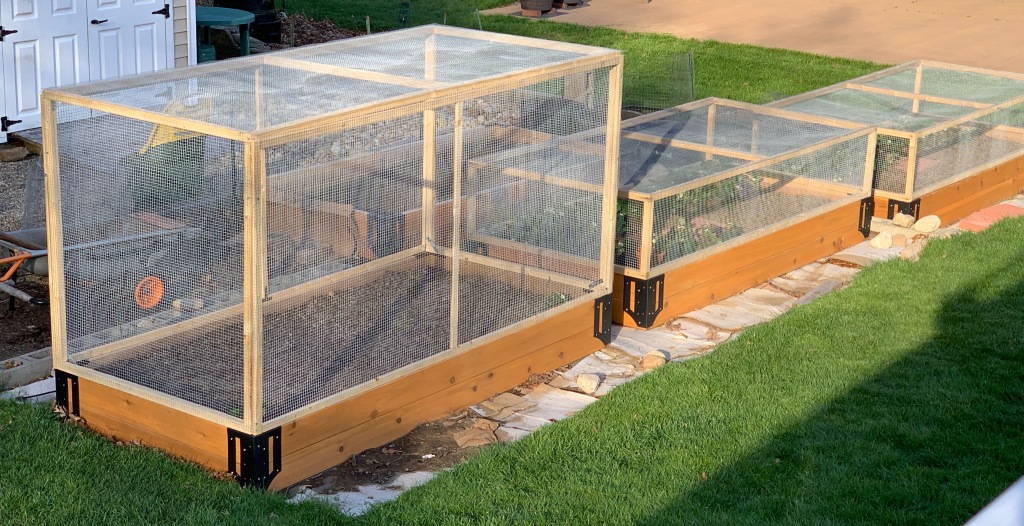
Garden Project: Finished. . . And Lessons Learned

It’s finished!

If you haven’t seen the beginning of this project, check out the first three posts: New Beginnings, Getting There, and So Close.

After installing all the cages on the garden beds, I took a trip to The Herb Farmacy in Salisbury, MA. It’s always fun and interesting to browse the selections in their greenhouses. They’re the gardner’s version of a candy store! I chose some tomato, cuke, zucchini, and butternut squash plants. I also picked up a couple of nasturtiums and basil.

The zucchini and cuke plants now share space in one of the tall-caged beds, beside the peas, along with one of the nasturtiums.

In the other tall-caged bed, I put the two tomato plants and the basil. It’s hard to imagine these small seedlings will fill the space I’ve given them. It’s tempting to put too much, too close together. In the past, I’ve done just that and ended up with a garden jungle! This year, I’m trusting the process. 🙂

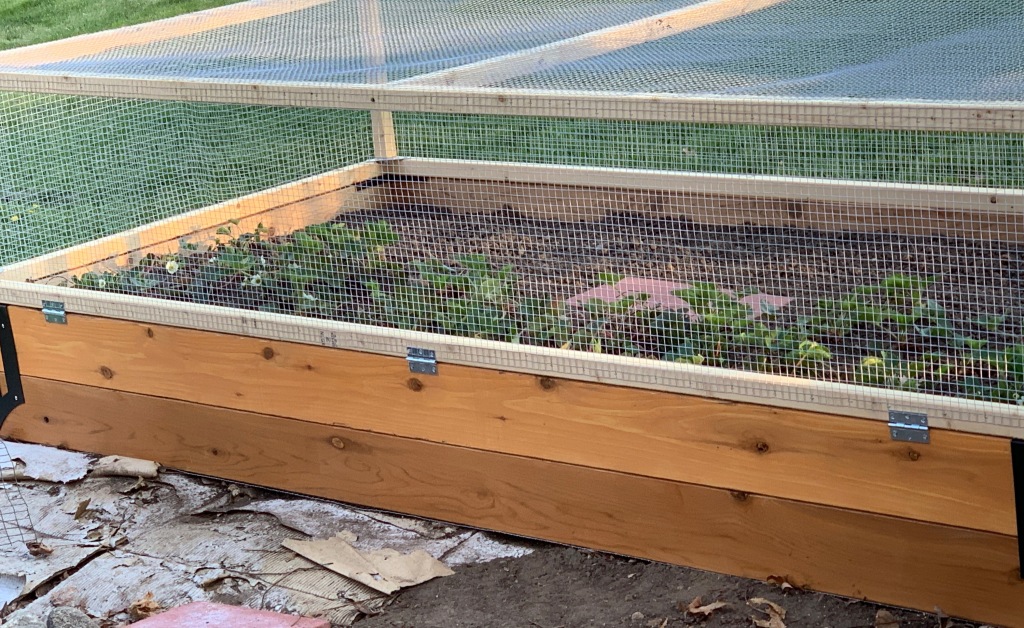
The butternut squash and the 2nd nasturtium went into one of the low-caged beds in front of the strawberries.

Meanwhile, the spinach, kale, lettuce, beets and carrots are getting bigger, although recently assaulted by a blizzard of helicopter seeds.

Finally, it was time for the finishing touches. I planted marigolds in the cinder blocks outside the beds, then laid landscape paper and spread mulch around and in-between the beds. I splurged on the final embellishments: lovely potted pink geraniums placed on paving squares at a few outside corners.

The end result is just what I envisioned (well, pretty darn close, at least) and I’m looking forward to an easier, more productive gardening season this summer. I’ll leave you with a random list of things I learned during my garden-bed-building adventure:

  1. It takes hard work to bring a plan to fruition. Sometimes it’s fun. Sometimes it’s just hard.
  2. When you go to the local home improvement store to find nails similar to the ones you had on hand, but used up, be prepared to encounter a few well-meaning males who want to explain to you that a two-by-four is really only 1 1/2″ thick. (Thank you so much. <eye roll>)
  3. If you don’t buy all the nice cedar boards that you need in one trip, they may very well be gone next time you go looking for them. (sigh)
  4. You can’t construct a perfectly square corner with two bowed boards.
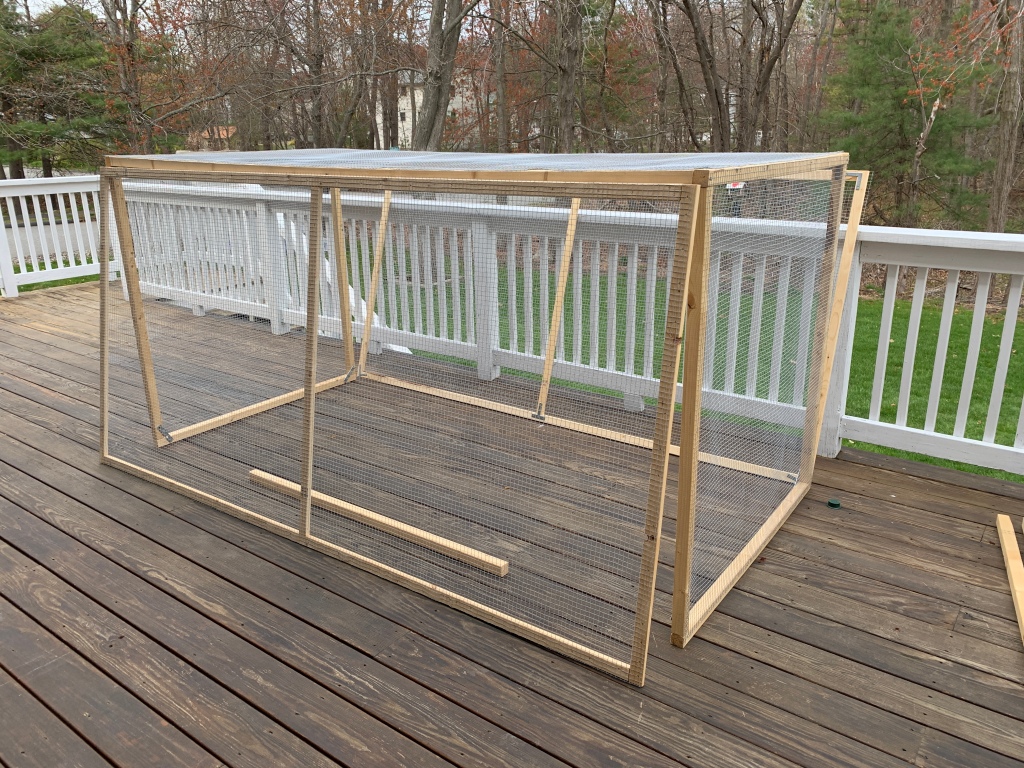
  5. Hardware cloth is not cloth at all.
  6. Your math-brain may see half-inch hardware cloth as a beautifully squared grid, like graph paper, but it’s not.
  7. If the website doesn’t say SCREENED loam, it’s not.
  8. Close is good enough sometimes.
  9. There’s no shame in asking for help.
  10. It takes hard work to bring a plan to fruition… but it’s so worth it in the end. 🙂

Garden Project: So Close…

One of the greatest joys of this current garden project is that I set a goal, listed the interim steps in detail, gave myself a rough timeline, and have been sticking to it. The end product is in sight. If you want to read about the beginning of the project, check out New Beginnings and Getting There.

Something was eating the strawberry plants. At first, we set the short cages over them, just to keep them safe. But now hinges and chains have been installed on the short cages making them easy to open and close. I’m not 100% sure that the bees are getting through the cage openings, so I’ve been propping them open during the day. I’m looking forward to harvesting ripened strawberries this year, instead of having to pluck them early before the chipmunks and squirrels steal them.

The third and fourth beds will house taller plants, like tomatoes and zucchini. The frames of the taller cages are shaped like four-foot staples. (I have staples on the brain after attaching so many sections of hardware cloth!) The first tall cage was installed on the third garden bed using hooks and eyes, last week. Two flat, removable panels were attach to either side and secured with a simple combination of screws and wire.

This weekend, I managed to fill the 4th bed with soil, finally deciding to screen out a good deal of rocks and debris as I did so. It made the job harder, but was certainly worth the effort. Then, with the help of my husband, we secured the 2nd tall cage to the 4th bed and installed the two flat panels to close the cage. Finally, I attached old cabinet handles to the short cages to finish them.

What a sight to see — all four garden beds filled and covered and ready for the growing season.

Snow peas, potatoes, spinach, and kale have already been planted and are starting to come up. I still need to spruce up the area around the beds, but I’ve got time. In the next week or two, I’ll be taking a trip with my gardener-friend, Dawn, to the Herb Farmacy in Salisbury, MA, to pick up organic tomato and squash plants. I’m so looking forward to this new gardening adventure and hoping these new beds with their cages will make gardening a little more productive and fun.

Stay tuned for the final installment of Garden Project, when everything is planted and I’ve added the last few finishing touches. In the meantime, happy gardening! 🙂

Garden Project: Getting There

In Garden Project: New Beginnings, you can find a description of the beginning of this project.

Assembling four 4′ X 8′ boxes out of cedar was only the first step. I needed these garden beds to be critter proof if they were going to serve their purpose. So, I ordered a roll of hardware cloth, which isn’t cloth at all. It’s metal fencing, similar to chicken wire, but stronger. I decided on the roll with 1/2″ mesh — great for rain and sun and bees to get through, but not so for the smallest of chipmunks.

All this hardware cloth needed to be cut to size and stapled onto the bottom of the boxes as well as onto the frames of the cages (more about them in a minute). So, I bought a new wire cutter and went to town on the hardware cloth.

I had a couple of old Craftsman hand-staplers, but trying to find staples for them turned out to be more of a headache than it was worth. They seemed better suited for affixing yard-sale signs to utility poles than metal fencing to a 2″ X 6″ anyway. My daughter had a newer, more sturdy stapler. Hers was better suited for the job, but hard to use (with my small hand).

Thankfully, a neighbor stepped up and offered the use of their pneumatic staple gun. A total game-changer!

The cage designs took a little thought. They needed to be sturdy enough to hold up under the hardware cloth, but not so bulky that they’d block sunlight from the gardens. To save on both wood and fencing, I decided to make two of the cages about eighteen inches high, since they’d be protecting strawberry plants and other low plants, like carrots, beets, and leafy greens. I could even put squashes, like butternut or pumpkin, under these low cages.

Two of the cages needed to be high enough for taller plants. These would be four feet high, since that’s the width of the hardware cloth and also half the length of the boards I could buy for the cage frames. Would I do doors on the tall cages? That seemed like a lot of work and would require even more wood to frame the doors. Instead, I settled on removable front and back panels, so I could access the plants from both sides.

Picking through 1″ X 2″s and 2″ X 2″s to find the straightest ones was even harder than finding straight cedar boards. We (my daughter and I) settled for mostly straight. We quickly realized how many metal mending brackets (straight ones, L-shaped, T-shaped, and corner ones) we’d need to make these cages stable. Some brackets came with their own screws, but others left us rummaging through our own supplies of random leftover screws. We started with the low cages.

Again, the work was subject to the weather, but we managed to get the two low cages built and covered with hardware cloth. The tall cages aren’t complete, yet.

Meanwhile, the cedar boxes needed to moved off our back deck to clear a space for building the cages. The old garden still needed to be dismantled, the new beds filled, and the strawberries transplanted.

It snowed the day my order of loam and compost was supposed to be delivered. So, they delivered it the following day. The compost was in great shape, but the loam was soaked and clumped like clay. Disappointing, not to mention heavy and hard to shovel.

The snow day gave me a chance to fix a casualty of too much bending over to staple hardware cloth.

Each 4′ X 8′ garden bed took hours for me to fill by myself. The first two took a full day each. I got help with the third one. And the fourth is still sitting empty. A lot of measuring and leveling was included in placing the beds and prepping them to be filled. The yard slopes (as most yards probably do) so a two-tiered garden space made sense. I used cinder blocks that had bordered the former garden space to divide the levels.

The strawberries, which have begun to flower, have been transplanted — just in time, apparently. Some animal (deer maybe?) has started nibbling. The small cages need to be attached with hinges as soon as possible.

Hopefully, in the next week or so, the tall cages will be done so the peas and a few other early crops can be started. Eventually, when all the veggies are safe in their caged beds, I’ll be able to clean up the area and top it off with some attractive mulch and flowers. Stay tuned!

Garden Project: New Beginnings

I haven’t done much blogging lately because all my creative energy has been channelled elsewhere. In other words, after a discouraging growing season in 2020, losing too many battles to the local squirrel, chipmunk, deer, and groundhog populations, I decided to go on the offensive. I’m building new garden beds.

Ideally, I wanted a totally enclosed gardening area, complete with a roof, to keep out those pesky invaders. But the price tag was absolutely laughable. So…plan B. I designed garden beds topped with cages instead. And I decided to build them myself. OK, not really all by myself. My daughter is helping me. She inherited my father’s chop saw and has it set up in her garage. She’s already used it to build a kitchen table, so I thought I’d count on her help and expertise. 🙂

My design consists of 4′ X 8′ beds with cages on top. The space I cleared in my yard can fit six of these beds, but I thought I’d start with four. Finding and buying lumber was my first step.

I wanted cedar, but no place had any 2′ X 10’s or 2′ X 12’s, so I settled for 2′ X 6’s that could be stacked for the sides of the beds. Our local lumber suppliers didn’t have these either, but they were available in a neighboring state. Road trip!

Picking through lumber to find twenty-four fairly straight eight-foot boards was no easy task. We, my daughter and I, found eighteen decent boards at our first stop. Then, we travelled another fifteen minutes north to buy an additional six. My trusty fifteen-year-old minivan transported the lumber back to my daughter’s garage. There, I measured and she cut, to make sixteen eight-foot boards and sixteen four-foot ones.

I shopped around online for garden bed corners and found these metal ones at Plow and Hearth. I bought them for the finished look they’d provide, but they turned out to be the perfect way to join imperfect lumber into half-decent rectangular boxes.

But first the wood needed to be treated. I used a poly-whey, food-safe stain for the outside and a food-safe internal wood stabilizer for the remainder of each board.

Finding a few dry March days in a row, above fifty degrees fahrenheit, in New England, was a challenge, but it finally happened.

And I managed to keep all the wood dry until it was stained and stabilized and ready to assemble into garden boxes.

So far, so good! Next time, I’ll show you the cages we’re building and, when they’re all in place, I’ll show you the final product. Until then, happy spring!!! 🙂