Garden Project: Finished. . . And Lessons Learned

It’s finished!

If you haven’t seen the beginning of this project, check out the first three posts: New Beginnings, Getting There, and So Close.

After installing all the cages on the garden beds, I took a trip to The Herb Farmacy in Salisbury, MA. It’s always fun and interesting to browse the selections in their greenhouses. They’re the gardner’s version of a candy store! I chose some tomato, cuke, zucchini, and butternut squash plants. I also picked up a couple of nasturtiums and basil.

The zucchini and cuke plants now share space in one of the tall-caged beds, beside the peas, along with one of the nasturtiums.

In the other tall-caged bed, I put the two tomato plants and the basil. It’s hard to imagine these small seedlings will fill the space I’ve given them. It’s tempting to put too much, too close together. In the past, I’ve done just that and ended up with a garden jungle! This year, I’m trusting the process. 🙂

The butternut squash and the 2nd nasturtium went into one of the low-caged beds in front of the strawberries.

Meanwhile, the spinach, kale, lettuce, beets and carrots are getting bigger, although recently assaulted by a blizzard of helicopter seeds.

Finally, it was time for the finishing touches. I planted marigolds in the cinder blocks outside the beds, then laid landscape paper and spread mulch around and in-between the beds. I splurged on the final embellishments: lovely potted pink geraniums placed on paving squares at a few outside corners.

The end result is just what I envisioned (well, pretty darn close, at least) and I’m looking forward to an easier, more productive gardening season this summer. I’ll leave you with a random list of things I learned during my garden-bed-building adventure:

  1. It takes hard work to bring a plan to fruition. Sometimes it’s fun. Sometimes it’s just hard.
  2. When you go to the local home improvement store to find nails similar to the ones you had on hand, but used up, be prepared to encounter a few well-meaning males who want to explain to you that a two-by-four is really only 1 1/2″ thick. (Thank you so much. <eye roll>)
  3. If you don’t buy all the nice cedar boards that you need in one trip, they may very well be gone next time you go looking for them. (sigh)
  4. You can’t construct a perfectly square corner with two bowed boards.
  5. Hardware cloth is not cloth at all.
  6. Your math-brain may see half-inch hardware cloth as a beautifully squared grid, like graph paper, but it’s not.
  7. If the website doesn’t say SCREENED loam, it’s not.
  8. Close is good enough sometimes.
  9. There’s no shame in asking for help.
  10. It takes hard work to bring a plan to fruition… but it’s so worth it in the end. 🙂

Garden Project: New Beginnings

I haven’t done much blogging lately because all my creative energy has been channelled elsewhere. In other words, after a discouraging growing season in 2020, losing too many battles to the local squirrel, chipmunk, deer, and groundhog populations, I decided to go on the offensive. I’m building new garden beds.

Ideally, I wanted a totally enclosed gardening area, complete with a roof, to keep out those pesky invaders. But the price tag was absolutely laughable. So…plan B. I designed garden beds topped with cages instead. And I decided to build them myself. OK, not really all by myself. My daughter is helping me. She inherited my father’s chop saw and has it set up in her garage. She’s already used it to build a kitchen table, so I thought I’d count on her help and expertise. 🙂

My design consists of 4′ X 8′ beds with cages on top. The space I cleared in my yard can fit six of these beds, but I thought I’d start with four. Finding and buying lumber was my first step.

I wanted cedar, but no place had any 2′ X 10’s or 2′ X 12’s, so I settled for 2′ X 6’s that could be stacked for the sides of the beds. Our local lumber suppliers didn’t have these either, but they were available in a neighboring state. Road trip!

Picking through lumber to find twenty-four fairly straight eight-foot boards was no easy task. We, my daughter and I, found eighteen decent boards at our first stop. Then, we travelled another fifteen minutes north to buy an additional six. My trusty fifteen-year-old minivan transported the lumber back to my daughter’s garage. There, I measured and she cut, to make sixteen eight-foot boards and sixteen four-foot ones.

I shopped around online for garden bed corners and found these metal ones at Plow and Hearth. I bought them for the finished look they’d provide, but they turned out to be the perfect way to join imperfect lumber into half-decent rectangular boxes.

But first the wood needed to be treated. I used a poly-whey, food-safe stain for the outside and a food-safe internal wood stabilizer for the remainder of each board.

Finding a few dry March days in a row, above fifty degrees fahrenheit, in New England, was a challenge, but it finally happened.

And I managed to keep all the wood dry until it was stained and stabilized and ready to assemble into garden boxes.

So far, so good! Next time, I’ll show you the cages we’re building and, when they’re all in place, I’ll show you the final product. Until then, happy spring!!! 🙂

Gratitude Spiral: Day 349

Today, I’m grateful for a coat of sealant on our back deck.

I put it off all summer but, thanks to a streak of warm November weather, was able to check it off my to-do list yesterday. It’s not one of my favorite jobs, but I’m grateful for the opportunity, the physical ability, and the resources to get it done.

What are you grateful for today?

Gratitude Spiral: Day 275

Today, I’m grateful for a delivery of rocks from the local home improvement store.

If all goes well, getting these rocks means finishing an outdoor landscaping project that’s been on hold. I’m looking forward to it. 🙂

What are you grateful for today?

Gratitude Spiral: Day 48

Today, I’m grateful for the completion of a home renovation project.

We’ve lived through quite a few home projects in the three decades we’ve lived in our house. Whether major or minor, they always come with some level of disruption and displacement. The completion of the project brings a sense of excitement, but also a  sense of balance and peace. And that’s what makes me smile today. 🙂

You?

Adventures in Painting…

DSC_0380Spring always stirs in me a desire for change. And a fresh coat of paint is a relatively simple way to satisfy that desire. So, this past April, I decided to paint our family room. In the past 25 years, I’ve painted every single room in our house — many of them several times. So, I should have known better than to think repainting the family room would be a simple job…

Before painting, I decided that the front windows needed a make-over. Our two bay windows had been dressed in heavy, lined drapes since we first moved in. This was necessary at first, due to the house’s southern exposure. But since then, we’ve had a farmer’s porch built on the front of the house and the windows replaced with energy efficient glass. The light coming in isn’t as intense as it once was. So, it was time for the drapes to go.

After consulting with two local blinds companies, I decided to go with cellular shades. And to make things easy – though not inexpensive – I paid to have them installed. No pics of the drapes, but here are the new shades:

I love how light and clean they make the windows look! Can you see where the traverse rods and valance brackets were attached?

After removing the screws that held all the rods and brackets in place, I discovered that some of the plastic anchors were fused inside the screw holes, so I had to push them in a bit and spackle right over them. The yellow room (on the left) only needed a paint touch-up around the window. I couldn’t find any remnant of the Amber Waves paint among my collection of half-full Benjamin Moore cans in the cellar, so I bought a quart and did a quick touch-up. It looked almost seamless. Close enough.

The Maple Leaf Red room was the one I actually planned to repaint. I needed to choose a color. I was thinking “same, but lighter.” Something like terracotta. After collecting more paint strips from the local hardware store and the big home improvement stores than I dare to admit, I couldn’t settle on a color that was “different” and yet “same” enough. And the names of all those colors can be very persuasive: cinnamon, spiced apple cider, peach mousse. Seriously, who gets to think up all these names? (Coveted job title: Official Paint Color Namer.)

Anyway, when you can’t make up your mind, what do you do? You ask EVERYBODY for opinions! I spread out the paint strips on the window sill and cornered every family member and every visitor for an opinion. Eventually, all discussions converged on spiced apple cider. So, I bought a gallon.

The most important part of a good room-painting job, yet my least favorite part, is masking. Painstakingly taping every edge of every door frame, window frame, and baseboard seems to take forever!  — especially when you’re anxious to see that new wall color. And this room had a mantlepiece and a ceiling beam to boot!

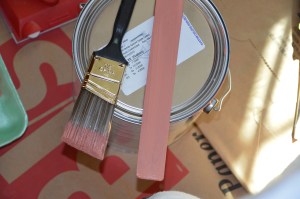
Finally, it was time to open the can of paint. I laid out my drop cloths, assembled my tools: screwdriver, paintbrush, roller, paint tray, and pried open the can. It looked awfully pink! But the color changes when it dries on the wall, I thought. So I painted a splotch or two.

Nope. Definitely not what I wanted.

Back at the hardware store, I requested a pint each of the next two darker shades on the same paint strip as spiced apple cider: baked terra cotta and warm sienna.

DSC_0387Warm sienna is what I really wanted! It’s the darkest of the three splotches above.

I used the rest of the pint to cut in at all my corners and edges. I figured I’d probably do a second coat anyway if there was a slight color variation in the gallon-size of warm sienna. Then, I headed back to the hardware store for the third time.

At home, I popped open my new gallon of warm sienna. It looked a bit light…but I started to pour it into the paint tray anyway. Now, I know that the color in a mixed pint is not an exact match for a mixed gallon of paint, but this looked like a pink swirl in the leftover paint from the pint can. Something was wrong!

I called the hardware store and they told me to bring it back and to bring along the pint can as well. Turns out that it had been mixed incorrectly – somehow! Since they had to mix a new gallon for me and I’d already used the paint from the pint can, they did a paint match on what was left in the pint. Free of charge, of course. 🙂 Evidently, it was slightly darker than it should have been.

So, after four trips to the store, I was finally ready to paint! The good news? It only took one coat!

DSC_0396And after all that, I got to buy some new accessories: new rug, plants and stands, pillows, and lampshades…my reward for all that hard work 🙂